Are you a newcomer to the world of car maintenance? Don’t fret! Replacing spark plugs might sound intimidating, but with the right guidance, even beginners can tackle this essential task with confidence. Spark plugs play a crucial role in your vehicle’s engine performance, ensuring efficient combustion and smooth operation. In this beginner’s guide, we’ll walk you through the process, step by step.
Understanding the Basics:
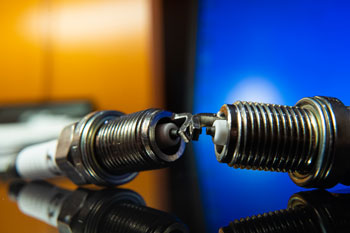
Before diving into the replacement process, it’s important to grasp the basics. Spark plugs are small but mighty components that deliver electric current to ignite the air-fuel mixture in the engine’s cylinders. Over time, they can wear out, leading to issues like misfires, poor fuel economy, and rough idling.
Gathering the Necessary Tools:
To get started, you’ll need a few basic tools: a socket wrench, spark plug socket, spark plug gap tool, and dielectric grease. These tools are readily available at most auto parts stores and won’t break the bank.
Locating the Spark Plugs:
The next step is locating the spark plugs in your vehicle’s engine bay. Typically, they’re found along the top or sides of the engine, connected to thick wires known as spark plug wires or ignition coils.
Removing the Old Spark Plugs:
With the spark plugs located, use the socket wrench and spark plug socket to carefully remove them from their respective cylinders. Take care not to damage the surrounding components or strip the threads.
Checking and Gapping the New Spark Plugs:
Before installing the new spark plugs, it’s crucial to check and adjust the gap to match your vehicle’s specifications. This ensures optimal performance and longevity.
Installing the New Spark Plugs:
Once the gap is set, apply a small amount of dielectric grease to the threads of the new spark plugs. Carefully thread them into the cylinder by hand to avoid cross-threading, then use the socket wrench to tighten them snugly.
Reconnecting Spark Plug Wires or Ignition Coils:
With the new spark plugs securely in place, reconnect the spark plug wires or ignition coils to each plug, ensuring a tight and secure connection. I highly recommend this set of spark plugs that we use on all of the vechicles.
Testing and Final Checks:
Before closing the hood, start the engine and listen for any unusual noises or vibrations. If everything sounds smooth, you’re good to go! Double-check all connections and make any necessary adjustments.
Conclusion
By following these simple steps, even beginners can successfully replace their spark plugs and keep their vehicles running smoothly. Remember, regular maintenance is key to prolonging the life of your car and avoiding costly repairs down the road. So don’t be afraid to roll up your sleeves and give it a try!
Disclaimer:
The information provided in this blog is for educational and informational purposes only. While we strive to provide accurate and up-to-date content, we cannot guarantee the completeness, accuracy, or reliability of the information presented.
It is important to understand that car engine and body repairs can be complex and potentially hazardous tasks. We are not professional auto mechanics, and the DIY techniques and tips provided should be used at your own discretion and risk.
We strongly advise consulting with a qualified and certified auto mechanic before attempting any repairs or modifications on your vehicle. Professional mechanics have the training, experience, and specialized equipment necessary to diagnose and address automotive issues safely and effectively.
By using the information presented in this blog, you agree that we shall not be held responsible or liable for any damages, injuries, or losses that may occur as a result of DIY car repairs. Always prioritize your safety and the well-being of your vehicle by seeking professional guidance when needed.
Amazon Affiliate Marketing Disclaimer: As an Amazon Associate, I earn from qualifying purchases. This means that if you click on an Amazon link included in this blog and make a purchase, I may earn a commission at no additional cost to you. This helps support the maintenance of this blog and allows me to continue bringing you valuable content on DIY auto repairs. Thank you for your support!