Set by Step Guide:
Lets get started!
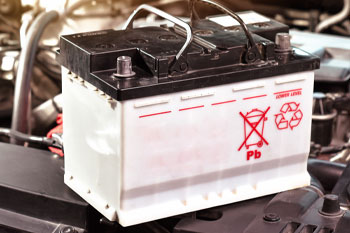
Hey there, fellow DIY auto enthusiasts! Is your car having trouble starting or showing signs of electrical issues? It might be time to replace your car battery. But don’t worry, swapping out your battery is easier than you think. Follow these simple steps to get your vehicle up and running smoothly again.
Step 1: Gather Your Tools Before diving into the battery replacement process, make sure you have the necessary tools on hand. You’ll typically need a wrench or socket set, battery terminal cleaner, and gloves for safety.
Step 2: Locate the Battery Pop the hood of your car and locate the battery. It’s usually found near the front of the engine bay, but the exact location can vary depending on the make and model of your vehicle.
Step 3: Disconnect the Old Battery Start by disconnecting the negative terminal first, followed by the positive terminal. Use your wrench or socket set to loosen the terminal nuts, then carefully remove the cables from the battery terminals. Be sure to tuck them away from the battery to prevent accidental reconnection.
Step 4: Remove the Old Battery Once the terminals are disconnected, you can remove the old battery from its housing. Be mindful of its weight, as car batteries can be quite heavy. Lift it out carefully and set it aside.
Step 5: Clean the Battery Tray Before installing the new battery, take a moment to clean the battery tray with a battery terminal cleaner. This will help ensure a secure and stable fit for the new battery.
Step 6: Install the New Battery Carefully place the new battery into the battery tray, ensuring it’s positioned correctly. Then, reconnect the positive terminal followed by the negative terminal, tightening the terminal nuts securely.
Step 7: Test the Connection Once the new battery is installed, give it a quick test to ensure everything is connected properly. Try starting your car to make sure it fires up without any issues.
Congratulations! You’ve successfully replaced your car battery and saved yourself a trip to the mechanic. Now you can hit the road with confidence, knowing your vehicle’s electrical system is in top-notch condition.
Disclaimer:
The information provided in this blog is for educational and informational purposes only. While we strive to provide accurate and up-to-date content, we cannot guarantee the completeness, accuracy, or reliability of the information presented.
It is important to understand that car engine and body repairs can be complex and potentially hazardous tasks. We are not professional auto mechanics, and the DIY techniques and tips provided should be used at your own discretion and risk.
We strongly advise consulting with a qualified and certified auto mechanic before attempting any repairs or modifications on your vehicle. Professional mechanics have the training, experience, and specialized equipment necessary to diagnose and address automotive issues safely and effectively.
By using the information presented in this blog, you agree that we shall not be held responsible or liable for any damages, injuries, or losses that may occur as a result of DIY car repairs. Always prioritize your safety and the well-being of your vehicle by seeking professional guidance when needed.
Amazon Affiliate Marketing Disclaimer: As an Amazon Associate, I earn from qualifying purchases. This means that if you click on an Amazon link included in this blog and make a purchase, I may earn a commission at no additional cost to you. This helps support the maintenance of this blog and allows me to continue bringing you valuable content on DIY auto repairs. Thank you for your support!